
Custom Oak Desktop Organizer
Author

Hey there! I’m Ricky, and I’m excited to share my latest DIY project – a custom oak desktop organizer. This project not only helps declutter your workspace but also adds a touch of elegance to your desk.
Follow along as I guide you through the steps to create a beautiful and functional piece that you’ll be proud to showcase.
Difficulty: Intermediate
Materials
- varies Oak boards (for base, side panels, and dividers)
- 1 bottle Wood glue
- 1 can Natural oil finish (e.g., Danish oil or similar)
- 1 piece Protective workspace liner
Tools
- Tape measure
- Combination square
- Pencil
- Miter saw
- Random orbital sander
- Sandpaper (coarse + fine grit)
- Dust mask
- Bar clamps
- Rag or applicator pad
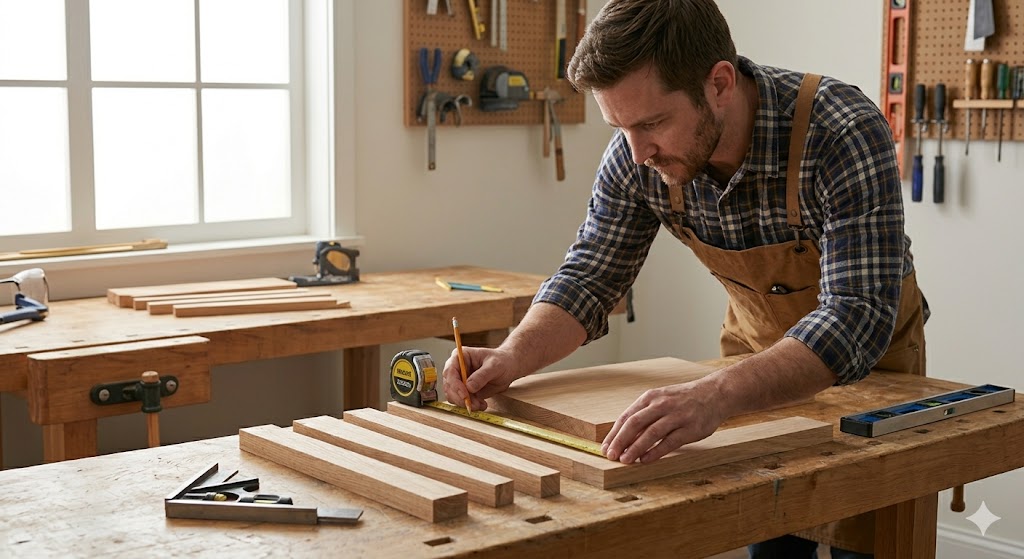
Step 1: STEP 1: MATERIAL SELECTION & LAYOUT
Lay your oak boards out across a clean workbench. Use a tape measure, a combination square, and a pencil to map out the exact dimensions for the base, the sloped side panels, and the interlocking internal dividers. Double-check your alignments before preparing to cut.
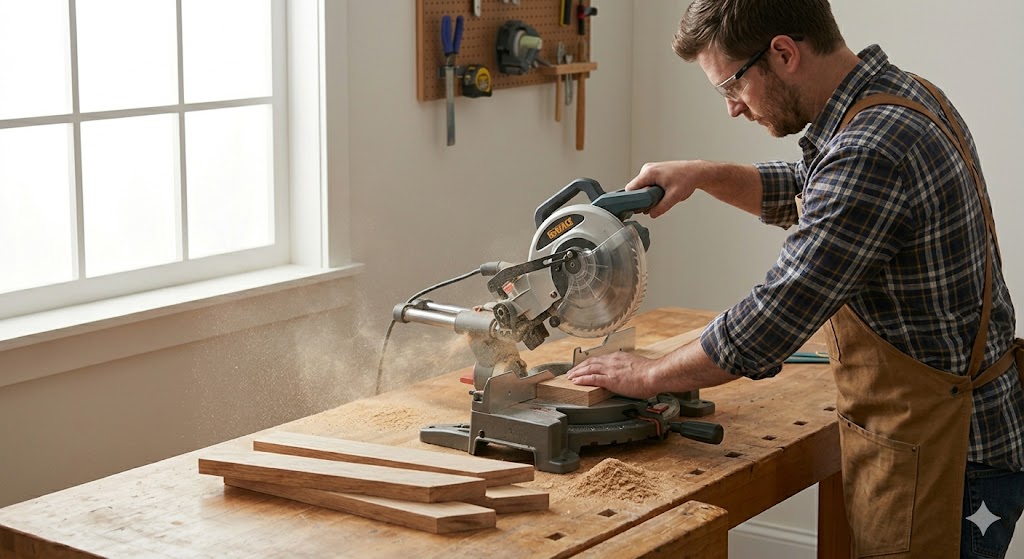
Step 2: ROUGH CUTTING
Secure your marked lumber to the workbench and use a miter saw to make clean, square cuts across your main panels. Take your time to align the blade with the waste side of your pencil lines to ensure all matching pieces finish at identical lengths.
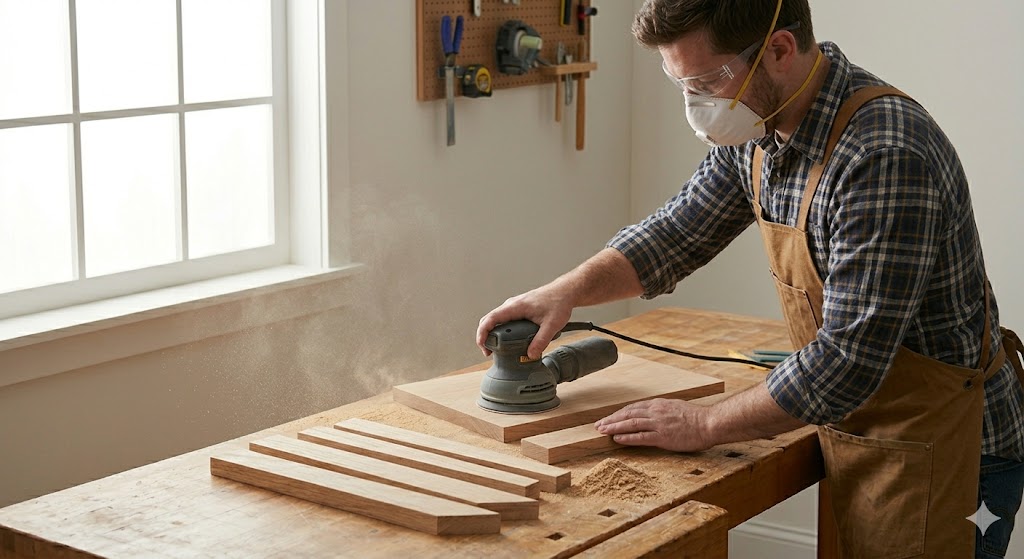
Step 3: SURFACE AND EDGE PREP
Don a dust mask and use a random orbital sander to smooth the faces and edges of every cut component. Start with a coarser grit to clean up rough spots, then transition to a fine grit to knock down sharp corners and prepare the wood surfaces for optimal assembly.
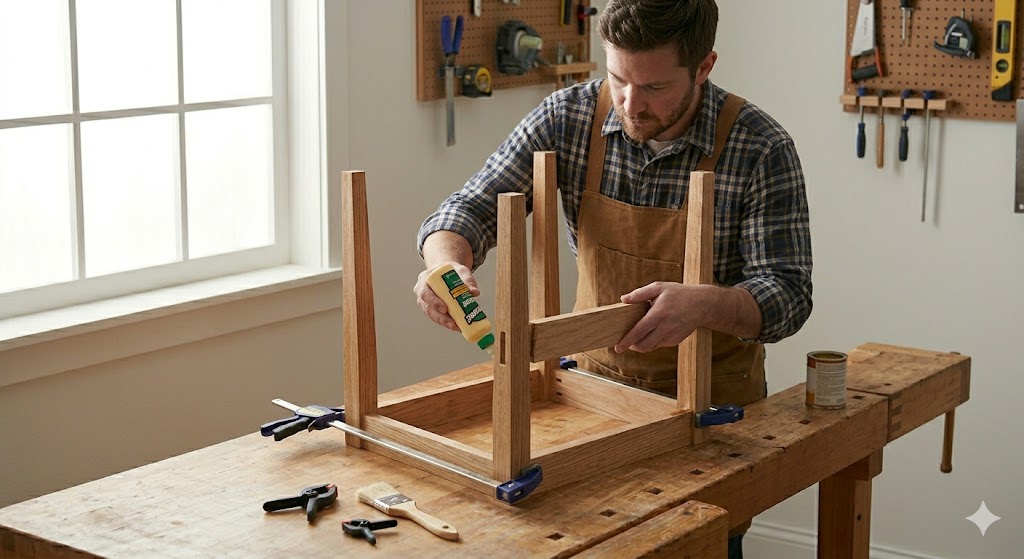
Step 4: DRY FIT AND ASSEMBLY
Position your side walls and base pieces upside down on the workbench to test the alignment of your joints. Once satisfied with the fit, apply a steady bead of wood glue along the connecting channels, assemble the main frame, and secure it with bar clamps until tight.
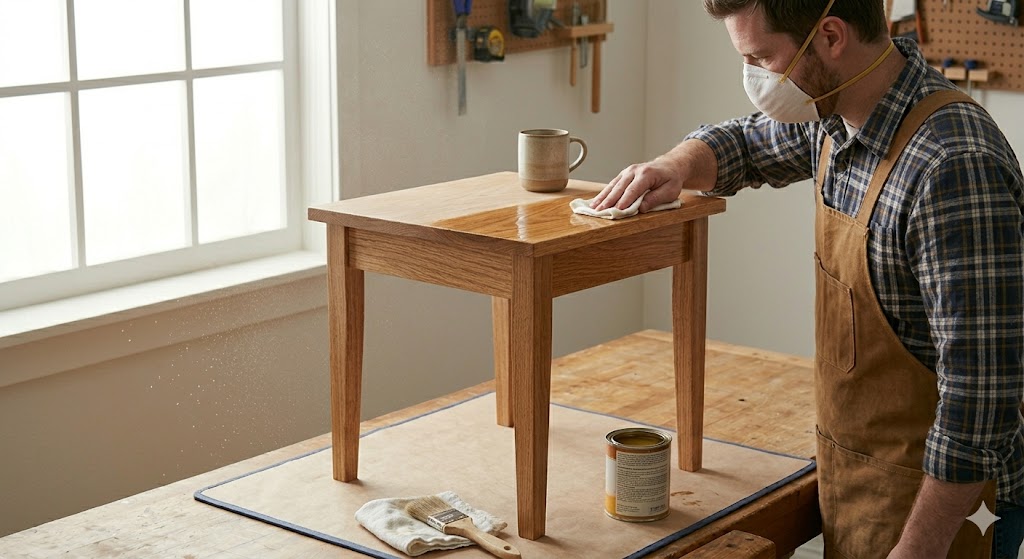
Step 5: APPLYING THE FINISHING SEAL
Flip the fully assembled piece upright onto a protective workspace liner. Use a clean rag or applicator pad to wipe on a rich, natural oil finish, working it deep into the grain to instantly deepen the oak’s character and provide a durable, lasting seal.
Project Tips
When selecting your oak boards, look for pieces with minimal knots and imperfections for the best finish. Also, remember to let the glue dry completely before removing the clamps to ensure a strong bond. For that extra touch, consider personalizing your organizer with engraved initials or a favorite quote.
A beginner to intermediate skill level is sufficient. Basic woodworking skills such as measuring, cutting, and sanding are required. Yes, you can use plywood or other hardwoods, but keep in mind that the appearance and durability may differ. Choose materials that suit your style and budget. The project typically takes about 4 to 6 hours to complete, including drying time for glue and finish. Common mistakes include mismeasuring parts, not allowing glue to dry properly, and skipping sanding which can lead to a rough finish. To maintain it, clean regularly with a damp cloth, avoid harsh chemicals, and apply wood polish or oil every few months to keep it looking good and to protect the wood.Frequently Asked Questions
What skill level is needed to build a custom oak desktop organizer?
Can I use different materials like plywood instead of oak?
How long will it take to complete the project?
What are common mistakes to avoid while building the organizer?
How do I maintain my oak desktop organizer?
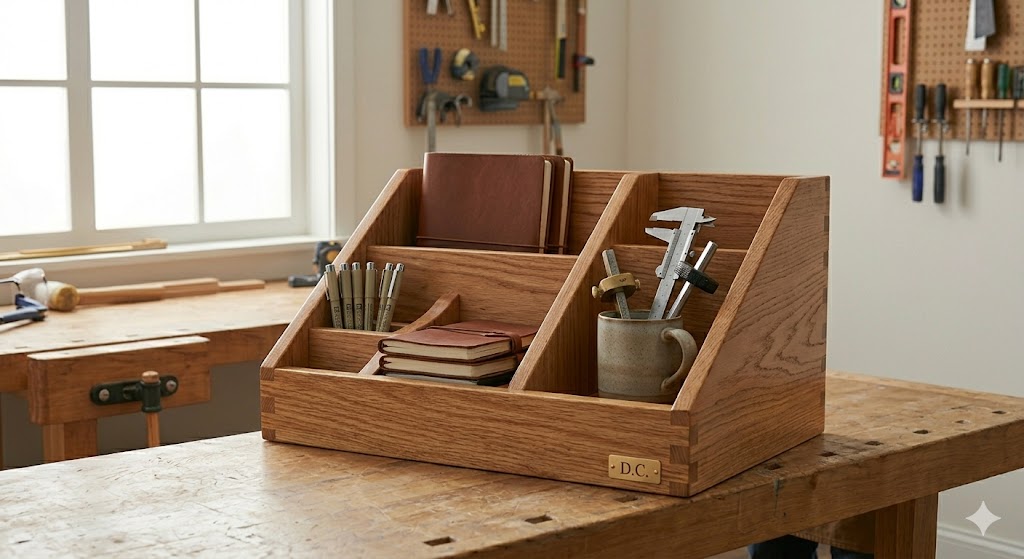
The Finished Project
This project was written for Trust Me Try It by Ricky Builds.