Peanut Butter and Jelly Poke Cake: Easy Dessert Recipe
Author

Peanut butter and jelly poke cake is the ultimate way to bring that classic sandwich flavor into dessert form. Seriously, who doesn’t love the sweet and salty combo of peanut butter and jelly? It’s simple, fun, and best of all, it’s an easy dessert recipe that anyone can whip up, even if you’re not a baking whiz.
More recipes from Cookingwithcj that you'll love


Watch How to Make It
Trust me, this cake is going to disappear faster than a cold drink on a hot day.
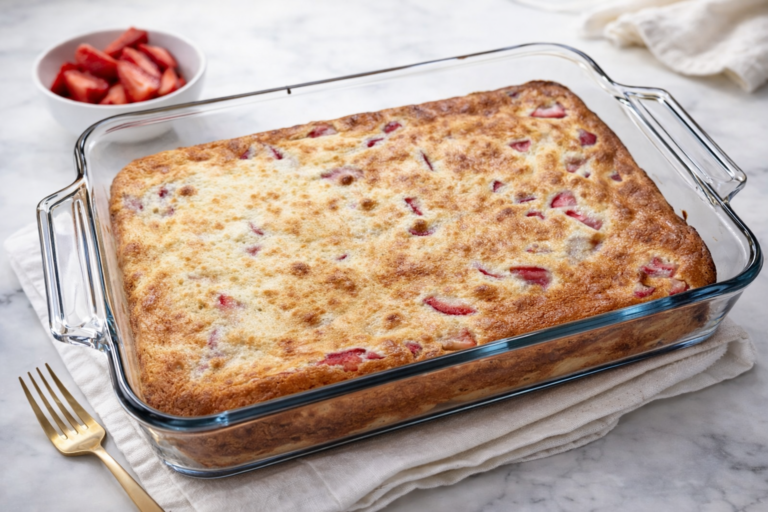
What makes this poke cake so special is that it’s not just about throwing some ingredients together. We’re poking holes in the cake and filling it with sweet, gooey jelly, making each bite a delightful burst of flavor. Plus, the creamy Cool Whip on top adds that perfect finish.
Whether you're serving it up for a party or just to satisfy your sweet tooth, this dessert is sure to impress.
Why You'll Love This Recipe
Let’s talk about what makes this peanut butter and jelly poke cake a must-try. First off, it’s incredibly easy to make. You’re using a box of yellow cake mix as your base, which means you can skip the heavy lifting of baking from scratch.
And the flavors? Oh man, the combination of peanut butter and jelly in a cake form is out of this world. It’s like a nostalgia trip every time you take a bite.
Another reason to love this recipe is its versatility. You can switch up the jelly flavor to match your mood or what you have on hand. Strawberry, grape, raspberry – the options are endless.
Plus, it’s a crowd-pleaser, so if you’re looking to wow your friends or family, this cake will definitely do the trick.
Ingredients & Tools You'll Need
To get started, you’ll need a few simple ingredients. Grab a box of yellow cake mix, some eggs, melted butter, creamy peanut butter, water, and a jar of your favorite jelly. I like to go heavy on the peanut butter because, well, why not?
It’s the star of the show. And don’t forget a tub of Cool Whip for that luscious topping that ties it all together.
You’ll also want to have a mixing bowl, a whisk, and a greased 9×13 baking dish ready. These tools will make your baking process smooth and easy. No fancy gadgets needed here-just your trusty kitchen essentials will do the trick.
How To Make It
Making this poke cake is super straightforward and a lot of fun. Let’s dive into the steps so you know exactly what to expect. We’ll break it down into preparation and cooking so you can stay organized and confident in the kitchen.
Preparation
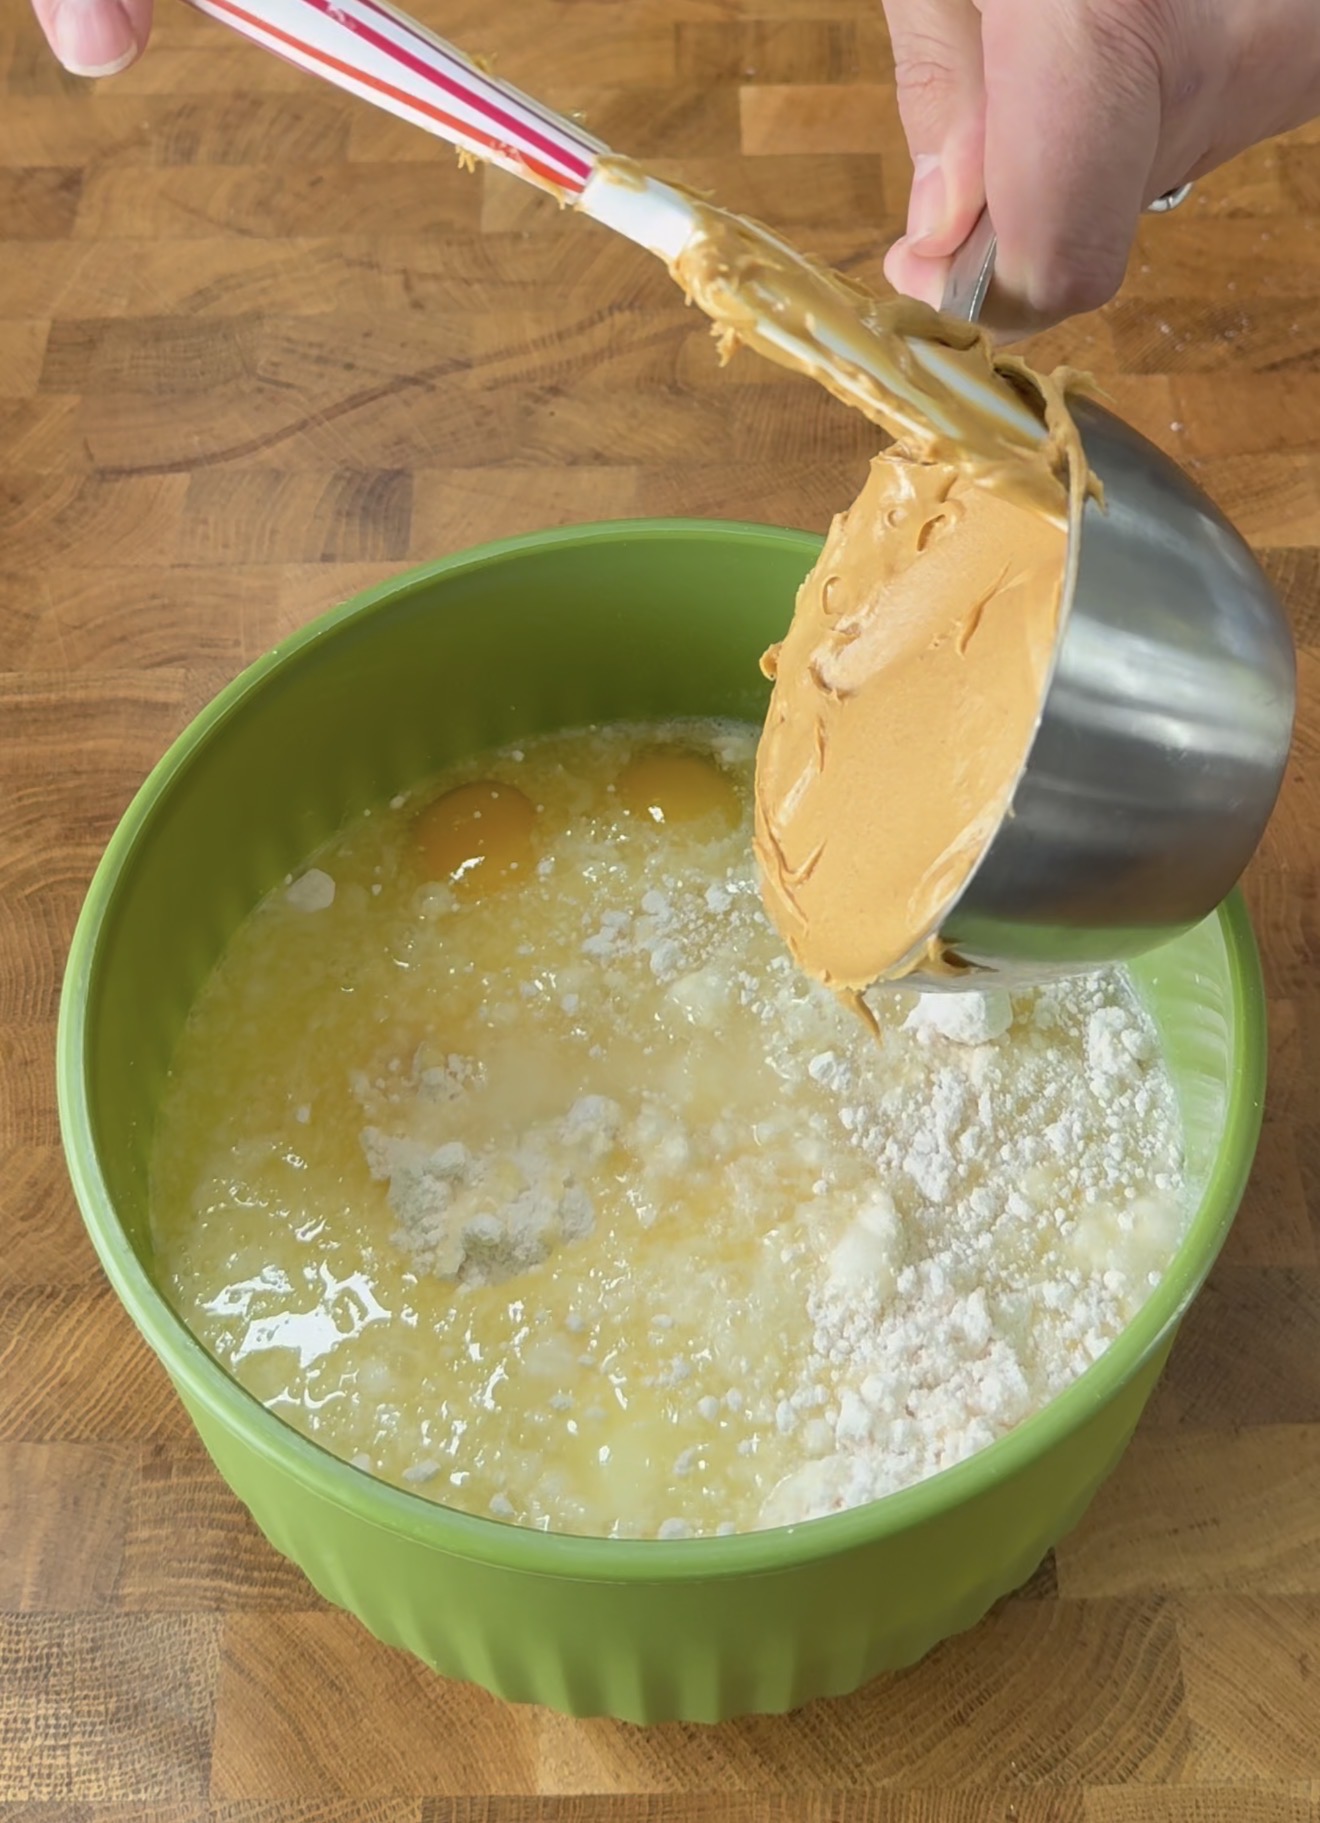
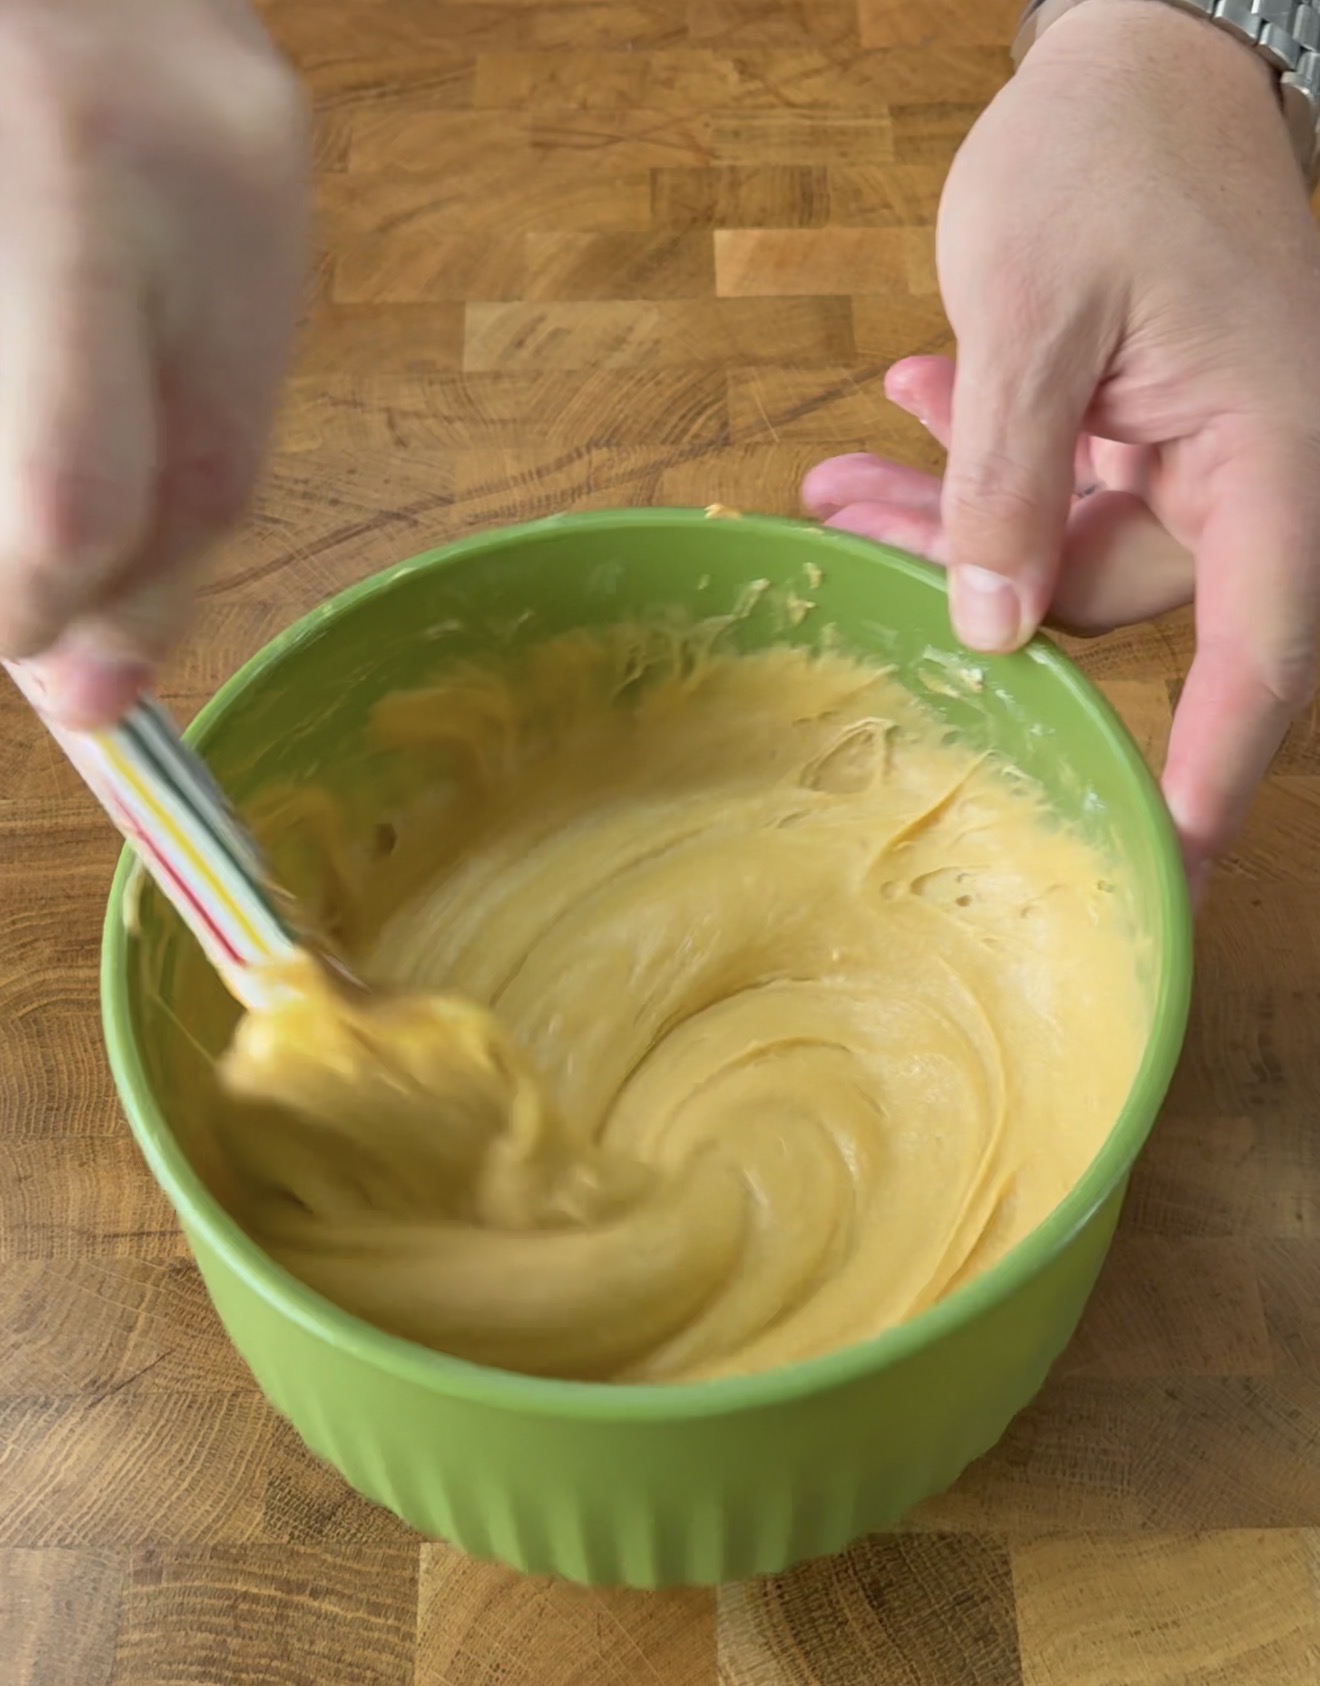
Start by pouring the cake mix into a mixing bowl. Then, add in the eggs, water, melted butter, and a cup of peanut butter. Stir it all together until it’s nice and smooth-this is where the magic happens.
You want a batter that’s well combined but don’t overmix it; a few lumps are okay.
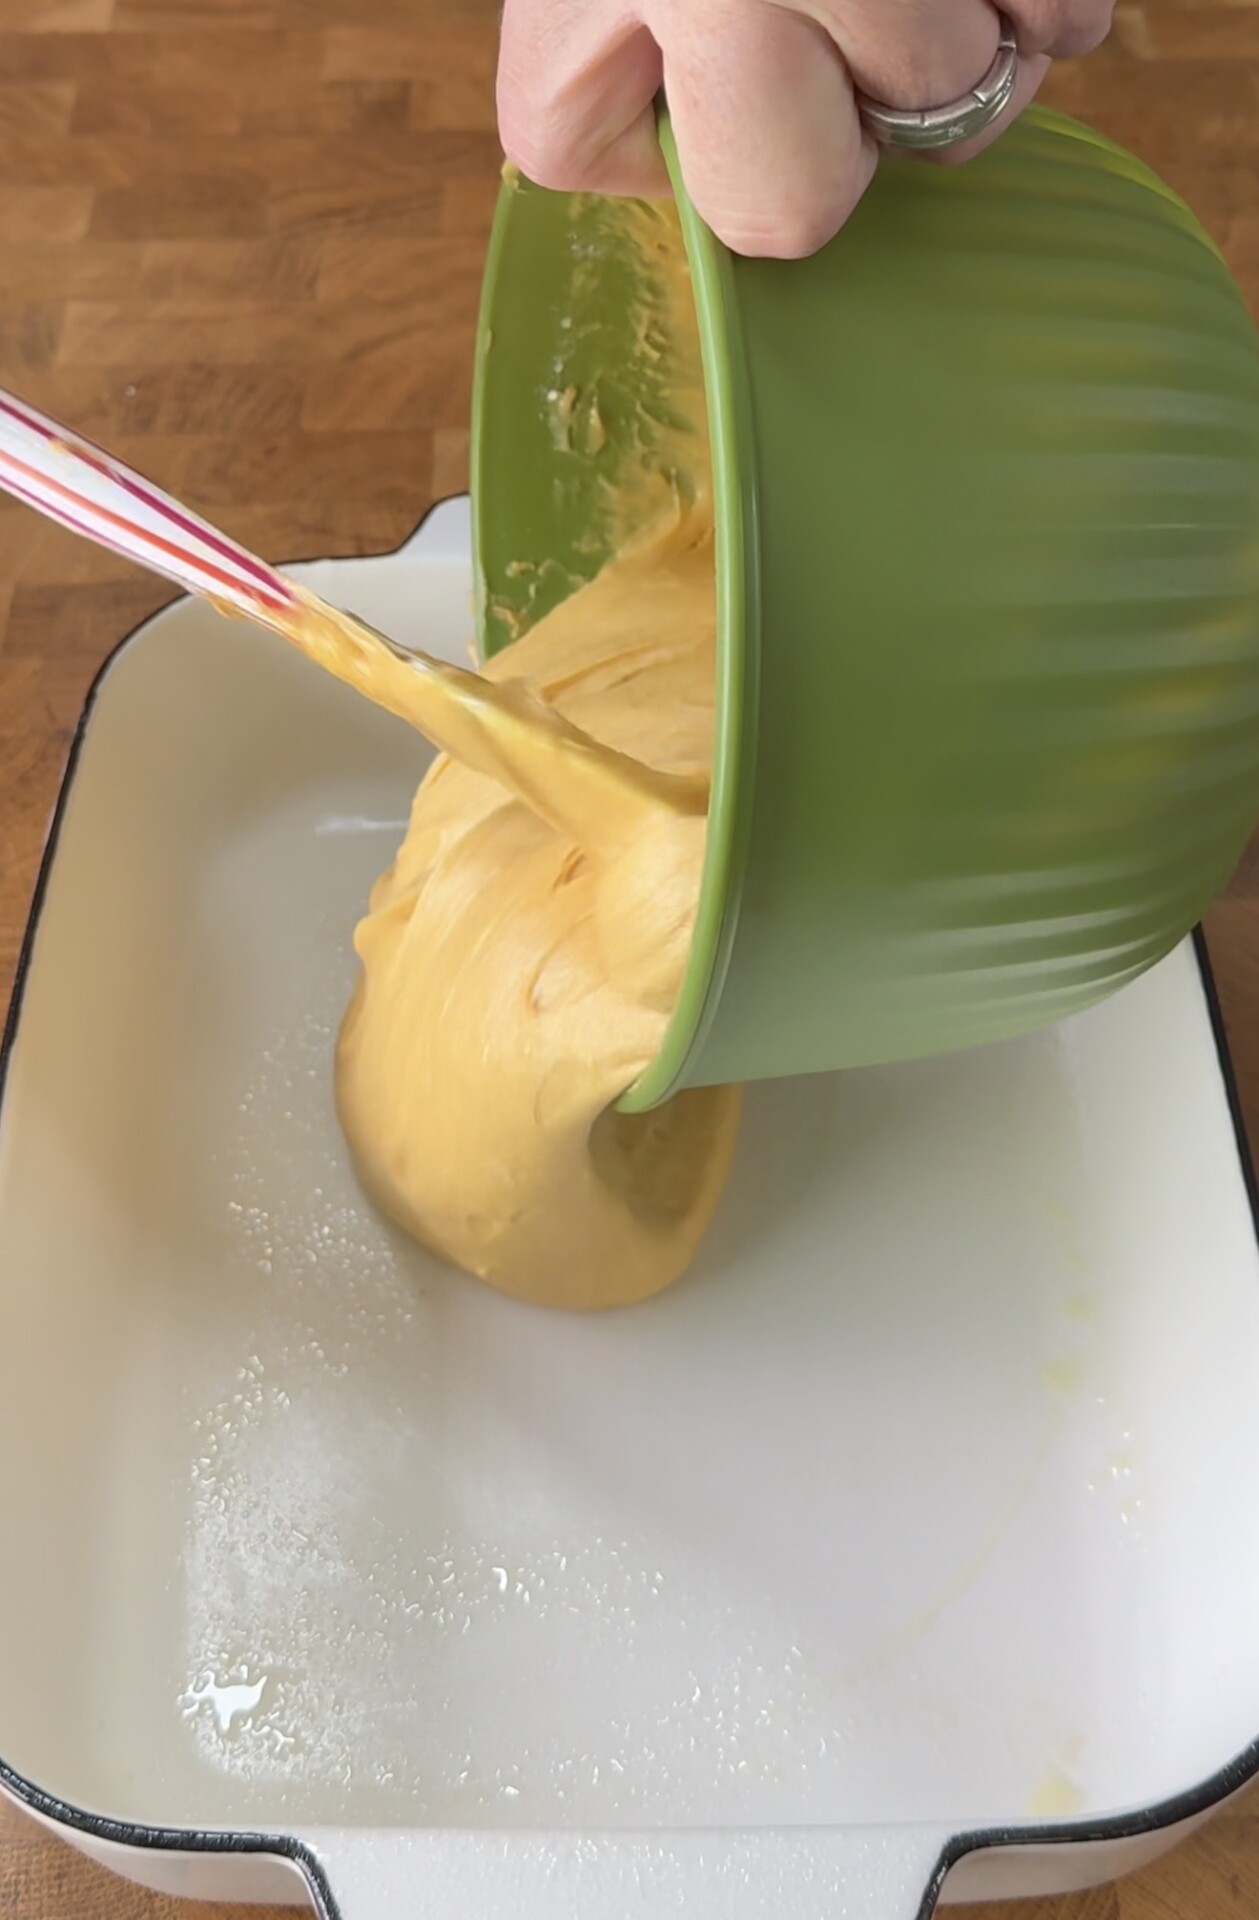
Once everything is mixed, pour the batter into your greased 9×13 baking dish. Now, it’s time to bake! Preheat your oven to 350°F and pop that cake in there for about 30-35 minutes.
You’ll know it’s ready when it’s golden brown on top and a toothpick comes out clean.
Cooking
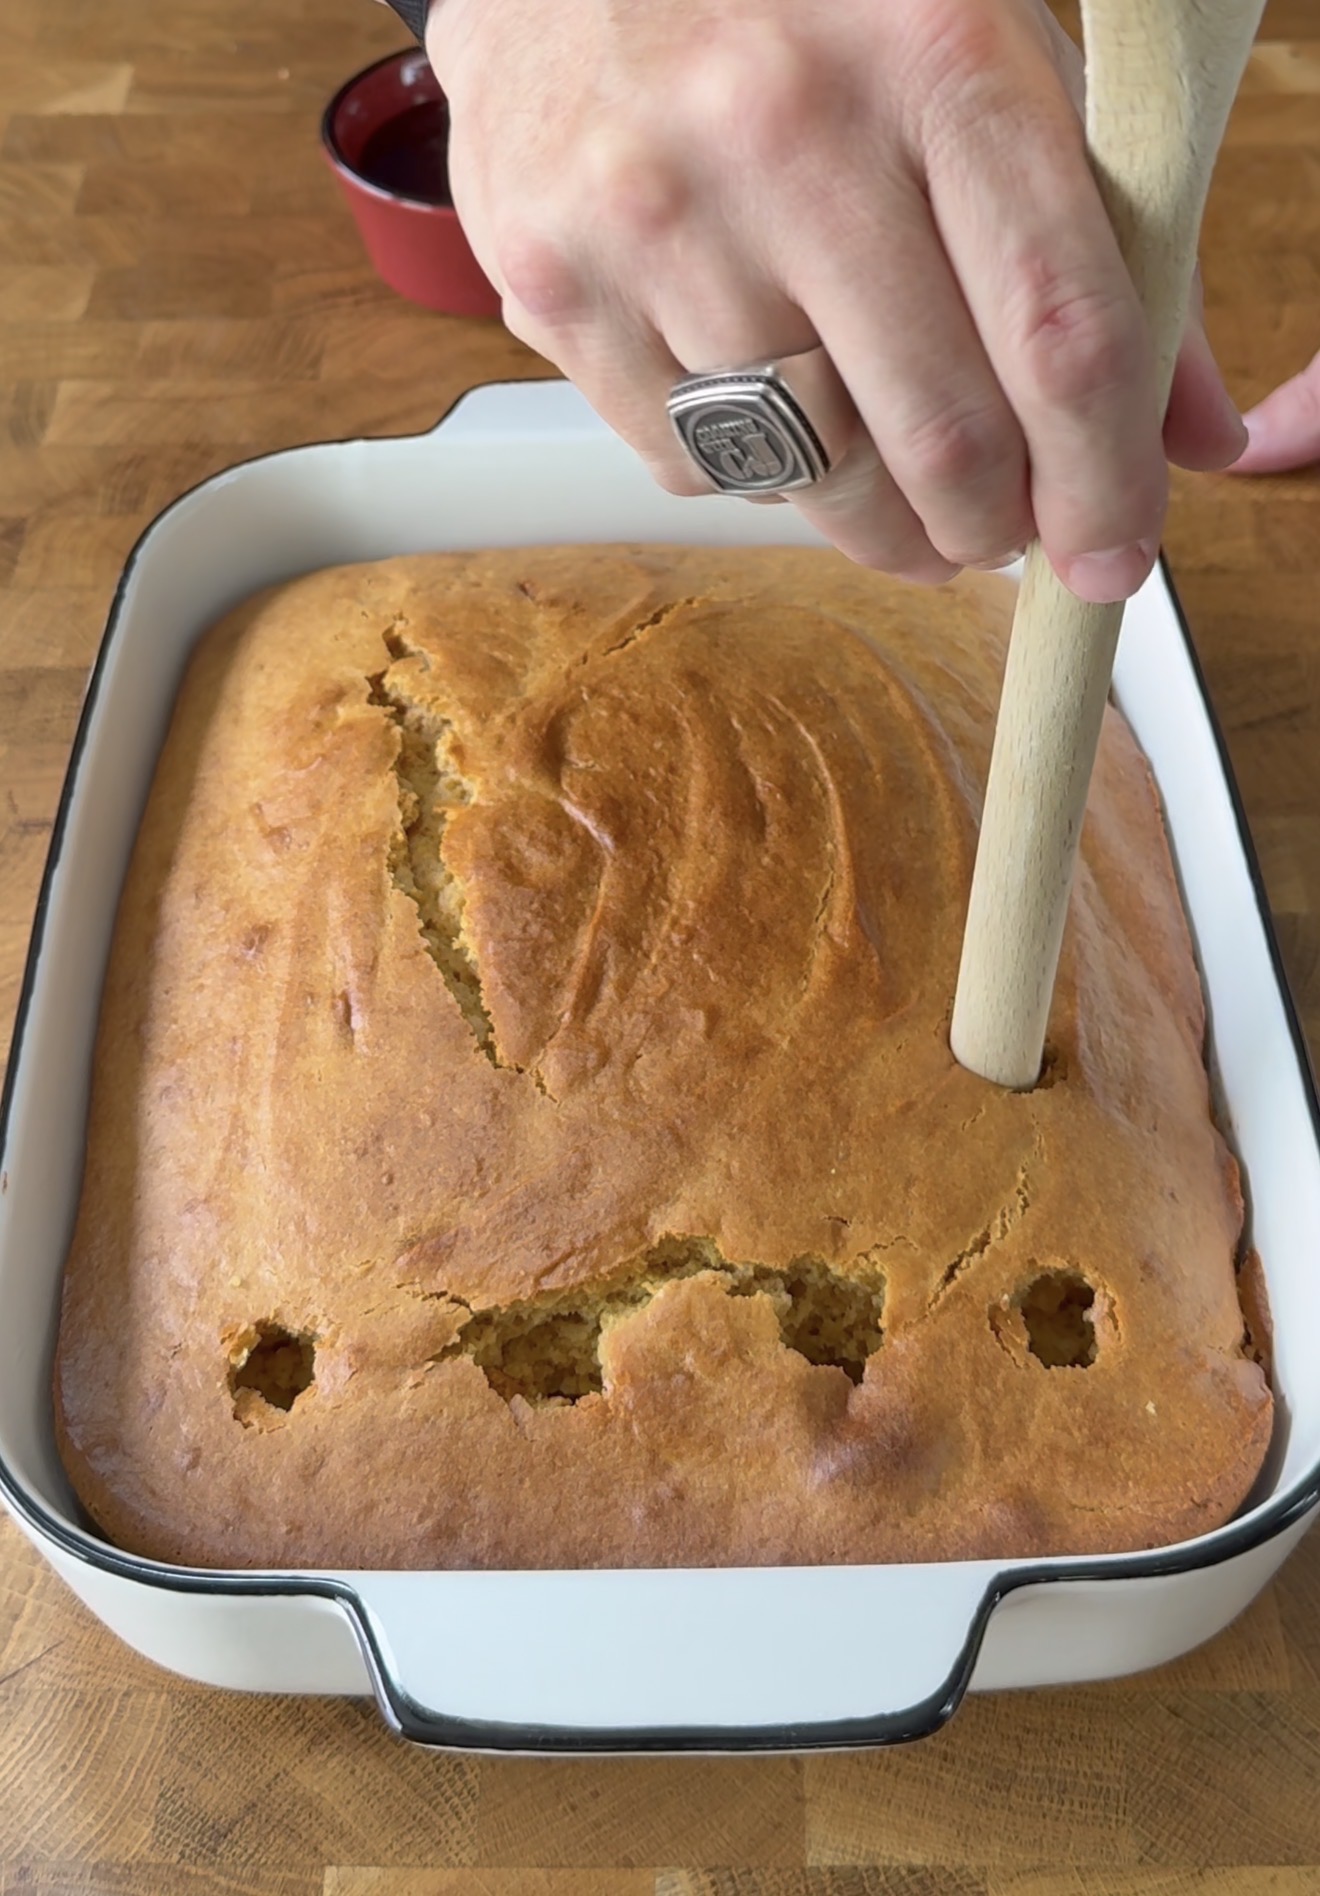
While the cake is baking, your kitchen will start to smell amazing. Once the time is up, take it out of the oven and let it cool completely. This step is crucial because we want the cake to be cool before we start poking holes in it.
Trust me, if you skip this, you’ll end up with a gooey mess instead of the beautiful poke cake you’re aiming for.
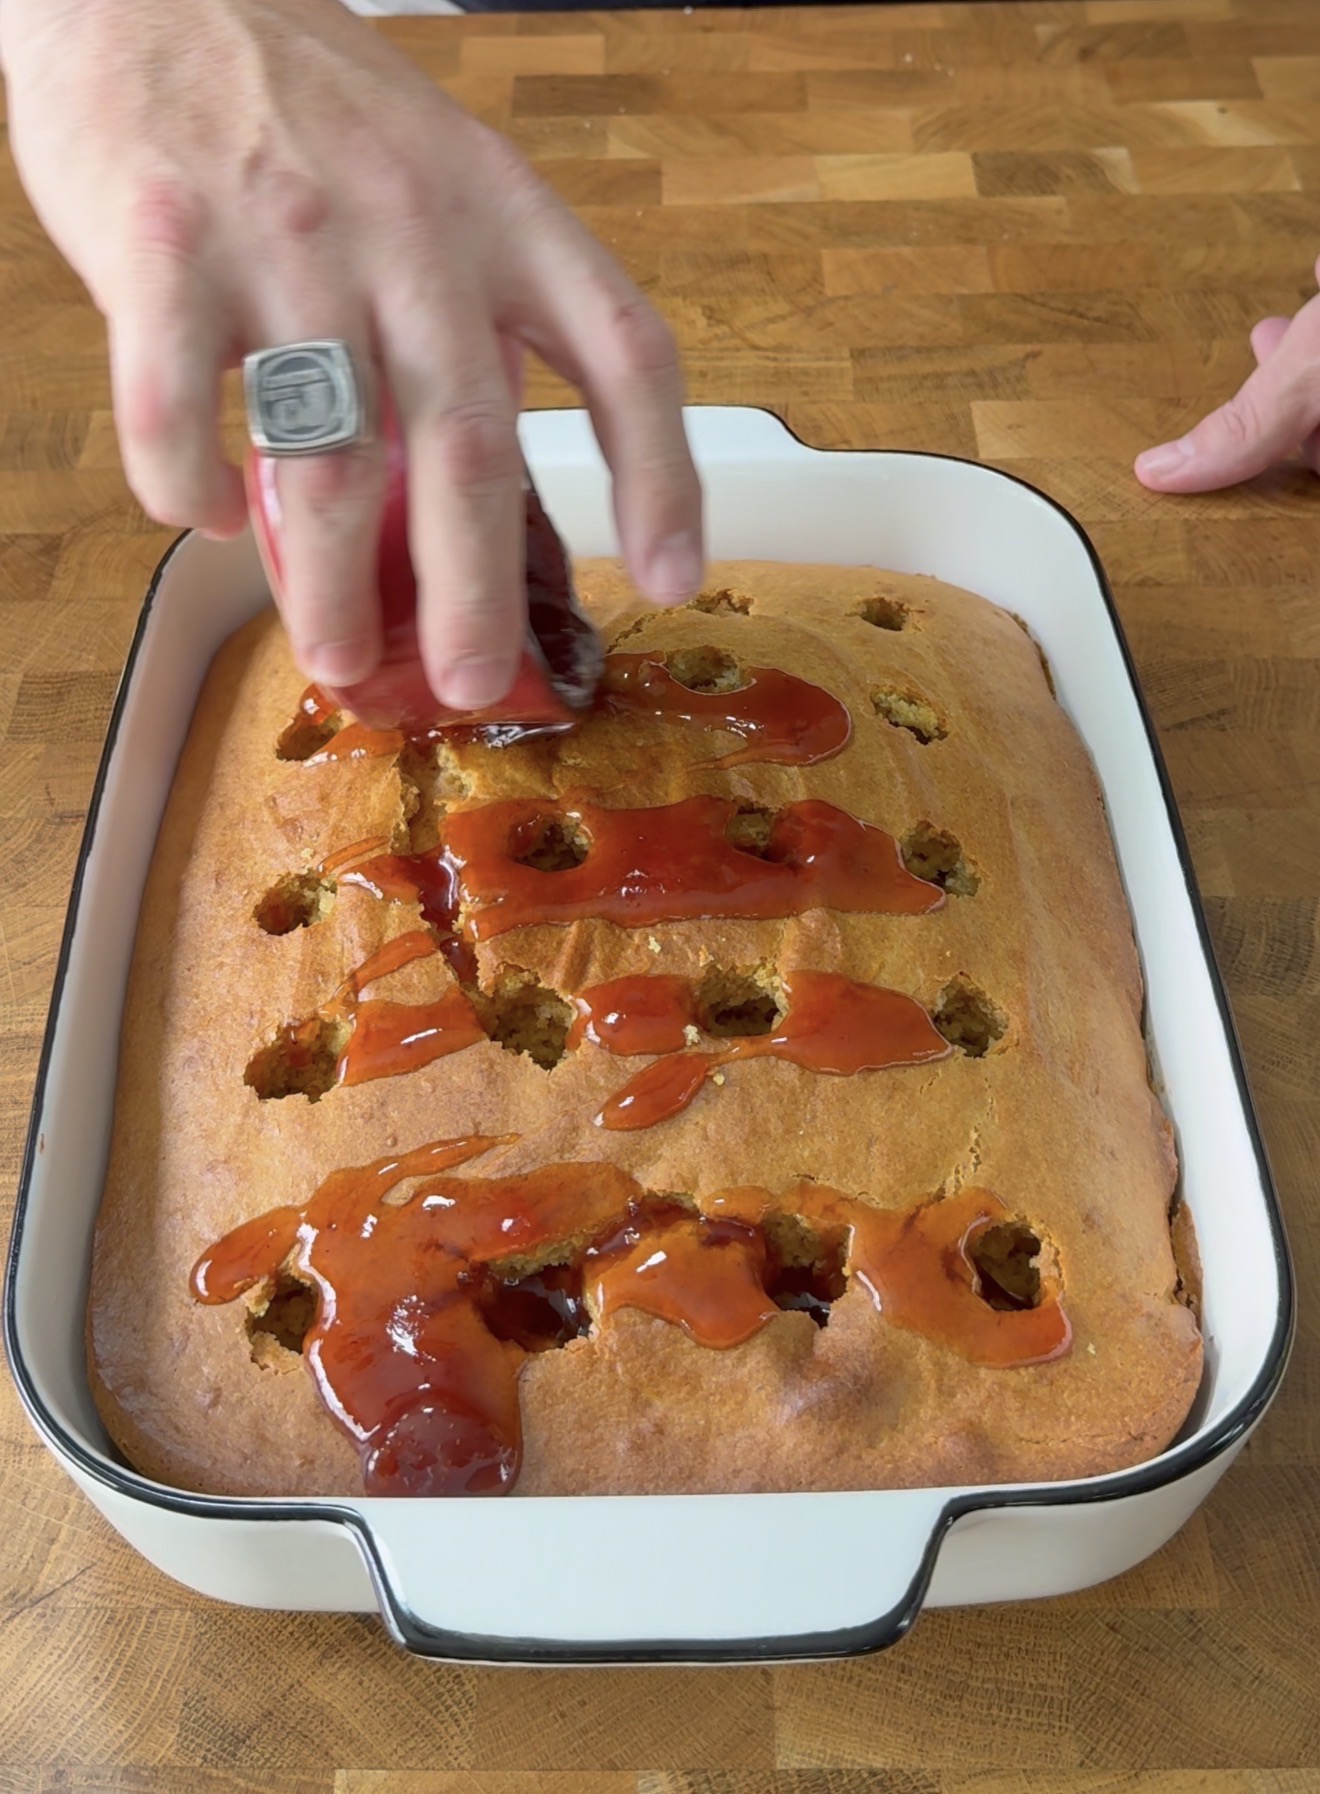
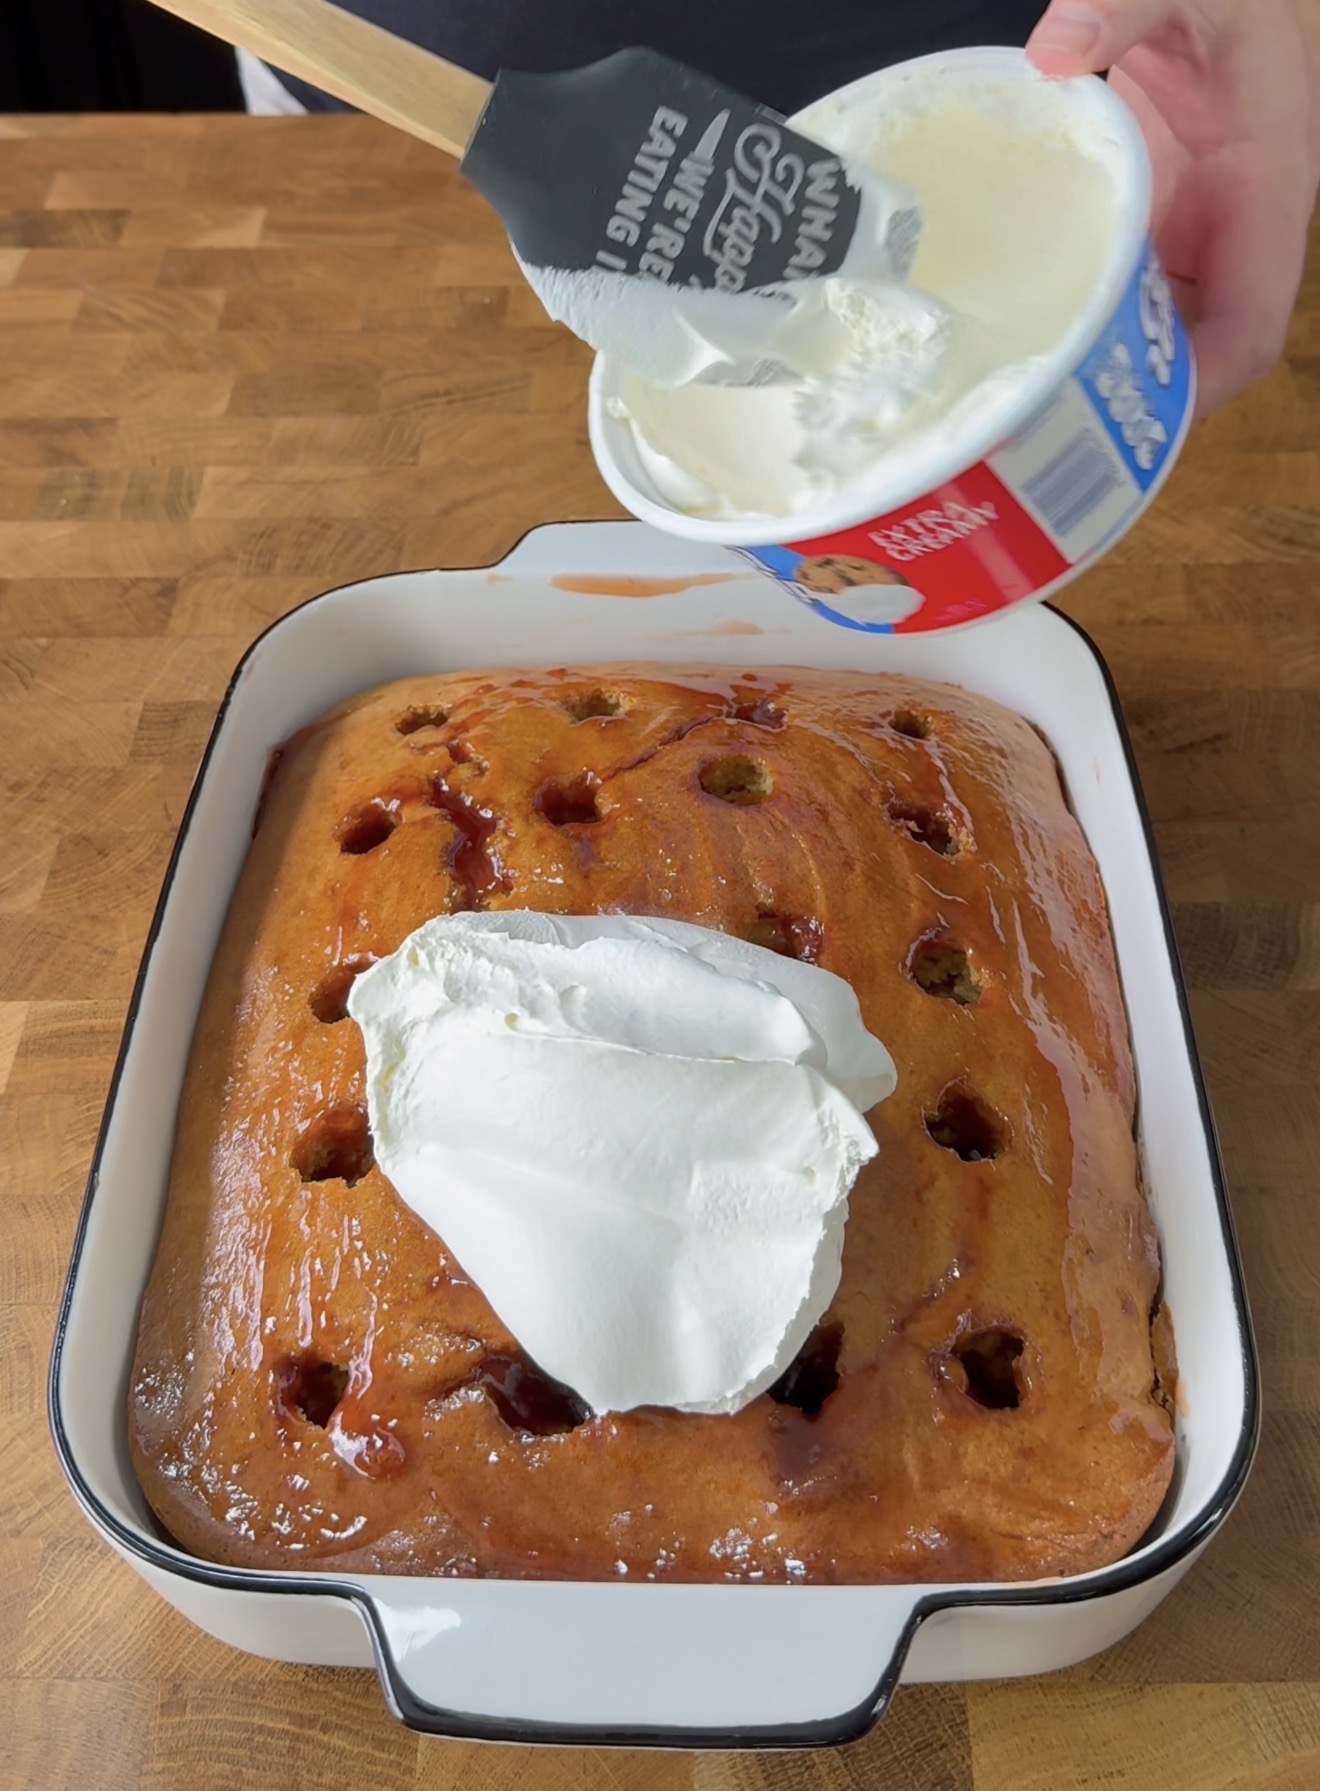
After it’s cooled, grab a wooden spoon or something similar and poke holes all over the top of the cake. Make them nice and deep so the jelly can really seep in. Now, take half a cup of the melted jelly and pour it over the cake, letting it fill those holes.
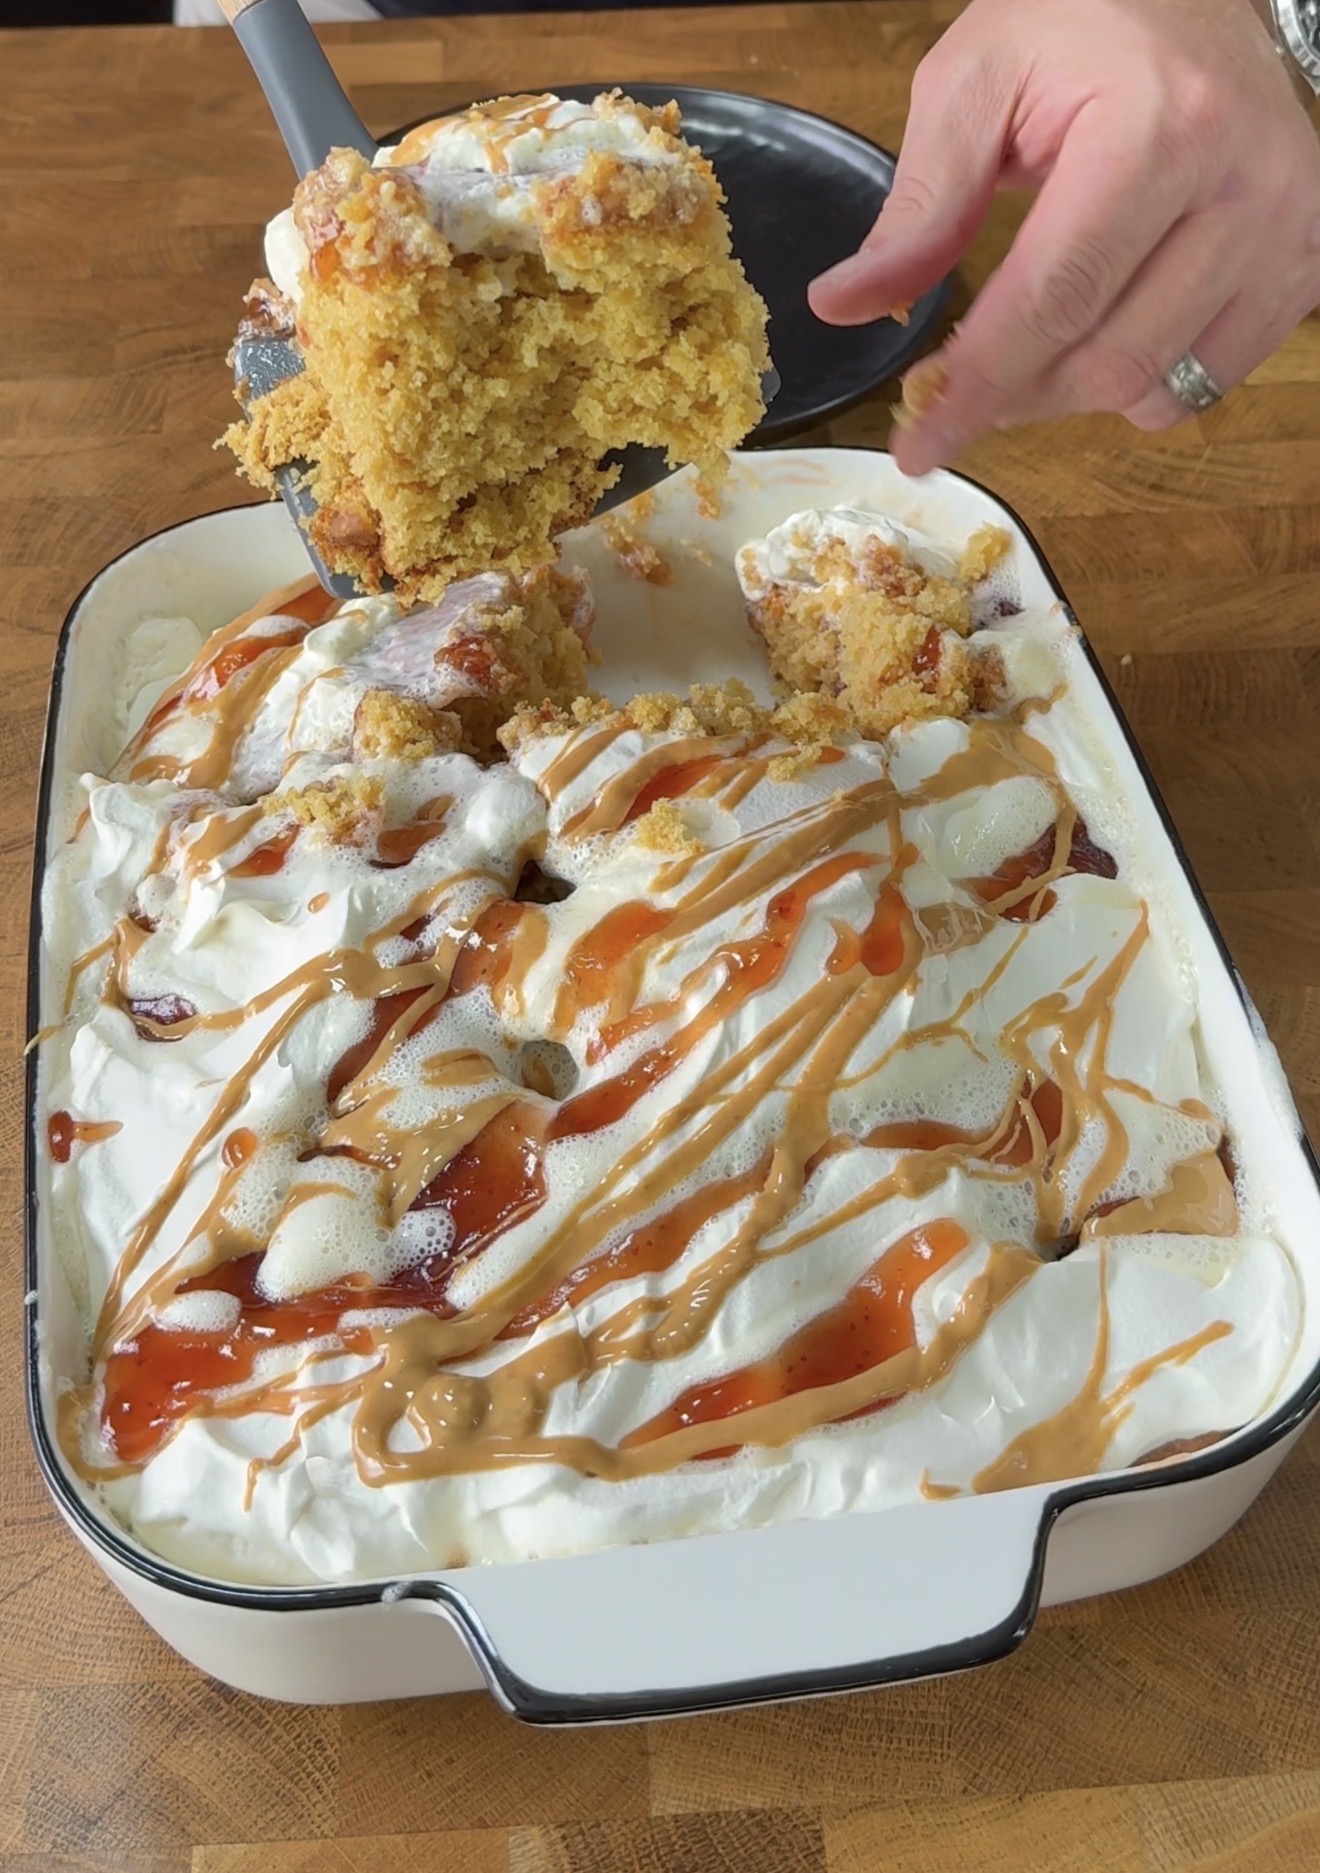
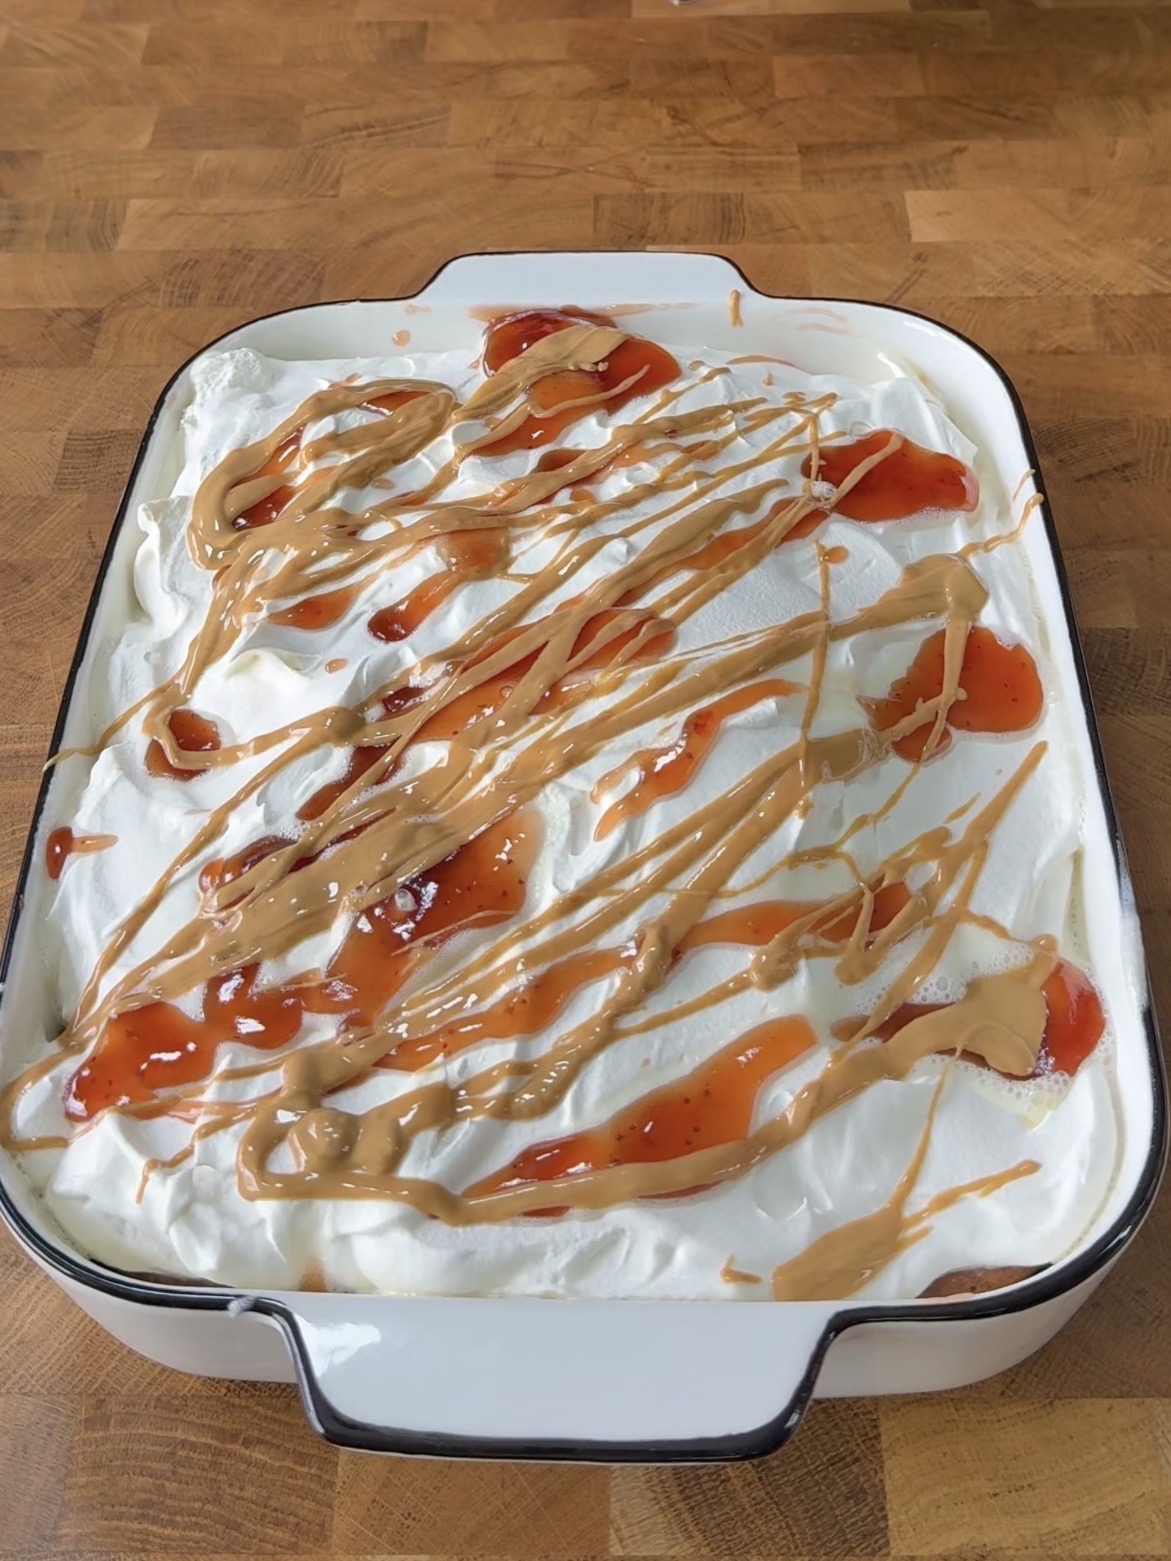
Finish it off by covering the top with Cool Whip and drizzling the rest of the melted jelly and peanut butter over it. You’re basically looking at dessert perfection here.
Serving & Variations
Now that your peanut butter and jelly poke cake is ready, it’s time to serve it up! It’s perfect on its own, but if you want to take it to the next level, try adding some crushed peanuts or chocolate shavings on top for extra crunch and flavor. You can even serve it with a scoop of vanilla ice cream if you’re feeling indulgent.
A common consensus among home cooks is that this cake tastes even better the next day after it has had time to chill in the fridge. The flavors meld together beautifully, making each bite even more delicious. If you have leftovers (which is rare, but hey, it happens), store them in an airtight container in the fridge for up to three days.
A poke cake is a type of cake that has holes poked into it after baking, allowing toppings or sauces to seep in for extra flavor. Yes, you can use natural peanut butter, but make sure to mix it well as it can be more liquid or thicker than regular peanut butter. Allow the cake to cool completely in the pan for about 30 minutes before adding the jelly and peanut butter layer. Yes, you can substitute the jelly with any fruit spread or jam of your choice to add different flavors. You can make a gluten-free poke cake by using gluten-free cake mix and ensuring that all other ingredients are gluten-free.Frequently Asked Questions
What is a poke cake?
Can I use natural peanut butter in this recipe?
How long does the Peanut Butter and Jelly Poke Cake need to cool before serving?
Can I substitute the jelly with another spread?
Is there a gluten-free option for this cake?
Wrapping Up
There you have it! A delicious peanut butter and jelly poke cake that’s super easy to make and sure to be a hit. Whether you’re enjoying it at a family gathering or just treating yourself after a long day, this cake is a delightful way to celebrate that classic flavor combo.
Recipe created by cookingwithcj for Trust Me Try It.
Even more from Cookingwithcj


Ingredients
- 1 box yellow cake mix.
- 3 eggs.
- 8oz melted butter.
- 11/2 cup peanut butter.
- 1 cup water.
- 1 cup melted strawberry jelly.
- 1 tub of Cool Whip.
Instructions
- Pour the cake mix into a mixing bowl
- Add the eggs, water, butter and 1 cup peanut butter
- Stir to combine
- Pour the mix into a greased 9×13 baking dish
- Place into a 350f oven for 30-35 minutes
- Remove the cake from the oven and let cool completely
- Poke wholes into the top of the cake
- Pour the 1/2 cup of the melted jelly over the cake and into the holes
- Cover the top of the cake with the cool whip
- Sizzle the rest of the melted jelly and peanut butter over the top
- Serve and enjoy!